Sharing Our Passion for Technology
& Continuous Learning

Prerequisites
This article builds on the prior article about AWS Fargate.
Add an Application Load Balancer
For a long time, AWS has supported an HTTP(S) load balancing service in the form of an Elastic Load Balancer{:target="_blank"} (now called a "Classic load balancer"). When paired with ECS, a classic load balancer suffers from a limitation where every node in the cluster it is balancing must be listening on the same port (the port is configured at the cluster level, not the node level). Because of this, a host port had to be mapped to the container port for each running instance. This prevented two containers from sharing a host if they were both mapped to the same host port. Fargate does not allow us to map host ports at all (because we don't control the host). So, we have to use a newer load balancer product called an Application Load Balancer{:target="_blank"}.
An Application Load Balancer{:target="_blank"} (or ALB) consists of three pieces:
- The Load Balancer represents an IP address and associated domain name that can receive traffic.
- One or more Listener{:target="_blank"} elements configure the ports and protocols the Load Balancer will receive traffic on. We will ultimately create two of these (one for HTTP on port 80 and one for HTTPS on port 443).
- Finally, a TargetGroup{:target="_blank"} represents a pool of back end services that can be load balanced across.
It is worth mentioning that we do not directly configure the TargetGroup{:target="_blank"} to reference our service. Instead, we point the service at the TargetGroup{:target="_blank"}. The service is responsible for allocating the cluster instances and then associating their IP addresses into the Load Balancer.
Add a Load Balancer to your app, by adding the following CloudFormation resources to your cloudformation.template.yaml:
LoadBalancerSG: #This security group allows us to whitelist traffic from the internet to our load balancer
  Type: "AWS::EC2::SecurityGroup"
  Properties:
    GroupDescription: "Load balancer security group"
    VpcId: !Ref VpcId
    SecurityGroupIngress:
      - IpProtocol: "tcp"
        CidrIp: "0.0.0.0/0"
        FromPort: 80
        ToPort: 80
      - IpProtocol: "tcp"
        CidrIp: "0.0.0.0/0"
        FromPort: 443
        ToPort: 443
AppSG: #This security group holds the application
  Type: "AWS::EC2::SecurityGroup"
  Properties:
    GroupDescription: "Application security group"
    VpcId: !Ref VpcId
    SecurityGroupIngress:
      - IpProtocol: "tcp"
        SourceSecurityGroupId: !Ref LoadBalancerSG
        FromPort: 1
        ToPort: 65000
LoadBalancer:
  Type: AWS::ElasticLoadBalancingV2::LoadBalancer
  Properties:
    Scheme: internet-facing
    Subnets: !Ref SubnetIds
    SecurityGroups:
      - !Ref LoadBalancerSG
LBListener:
  Type: AWS::ElasticLoadBalancingV2::Listener
  DependsOn:
    - LoadBalancer
    - TargetGroup
  Properties:
    DefaultActions:
    - Type: forward
      TargetGroupArn: !Ref TargetGroup
    LoadBalancerArn: !Ref LoadBalancer
    Port: 80
    Protocol: HTTP
TargetGroup:
  Type: AWS::ElasticLoadBalancingV2::TargetGroup
  DependsOn:
    - LoadBalancer
  Properties:
    TargetType: ip #the default is "instance" but we must use ip to forward to fargate
    VpcId: !Ref VpcId
    Protocol: HTTP # do not change to HTTPS
    Port: 3000
    HealthCheckPath: /hello
    HealthCheckIntervalSeconds: 10
    HealthCheckTimeoutSeconds: 5
    HealthyThresholdCount: 2
    UnhealthyThresholdCount: 2
    TargetGroupAttributes:
      - Key:  deregistration_delay.timeout_seconds
        Value:  30
You will also need to uncomment these lines from the Service definition:
  LoadBalancers:
    - ContainerName: ProductService
      ContainerPort: 3000
      TargetGroupArn: !Ref TargetGroup
and
  AwsvpcConfiguration:
    AssignPublicIp: ENABLED
    Subnets: !Ref SubnetIds
    SecurityGroups:
      - !Ref AppSG
Once deployed, AWS will assign a hostname to your load balancer that can be obtained by looking at the AWS Management Console as shown below:
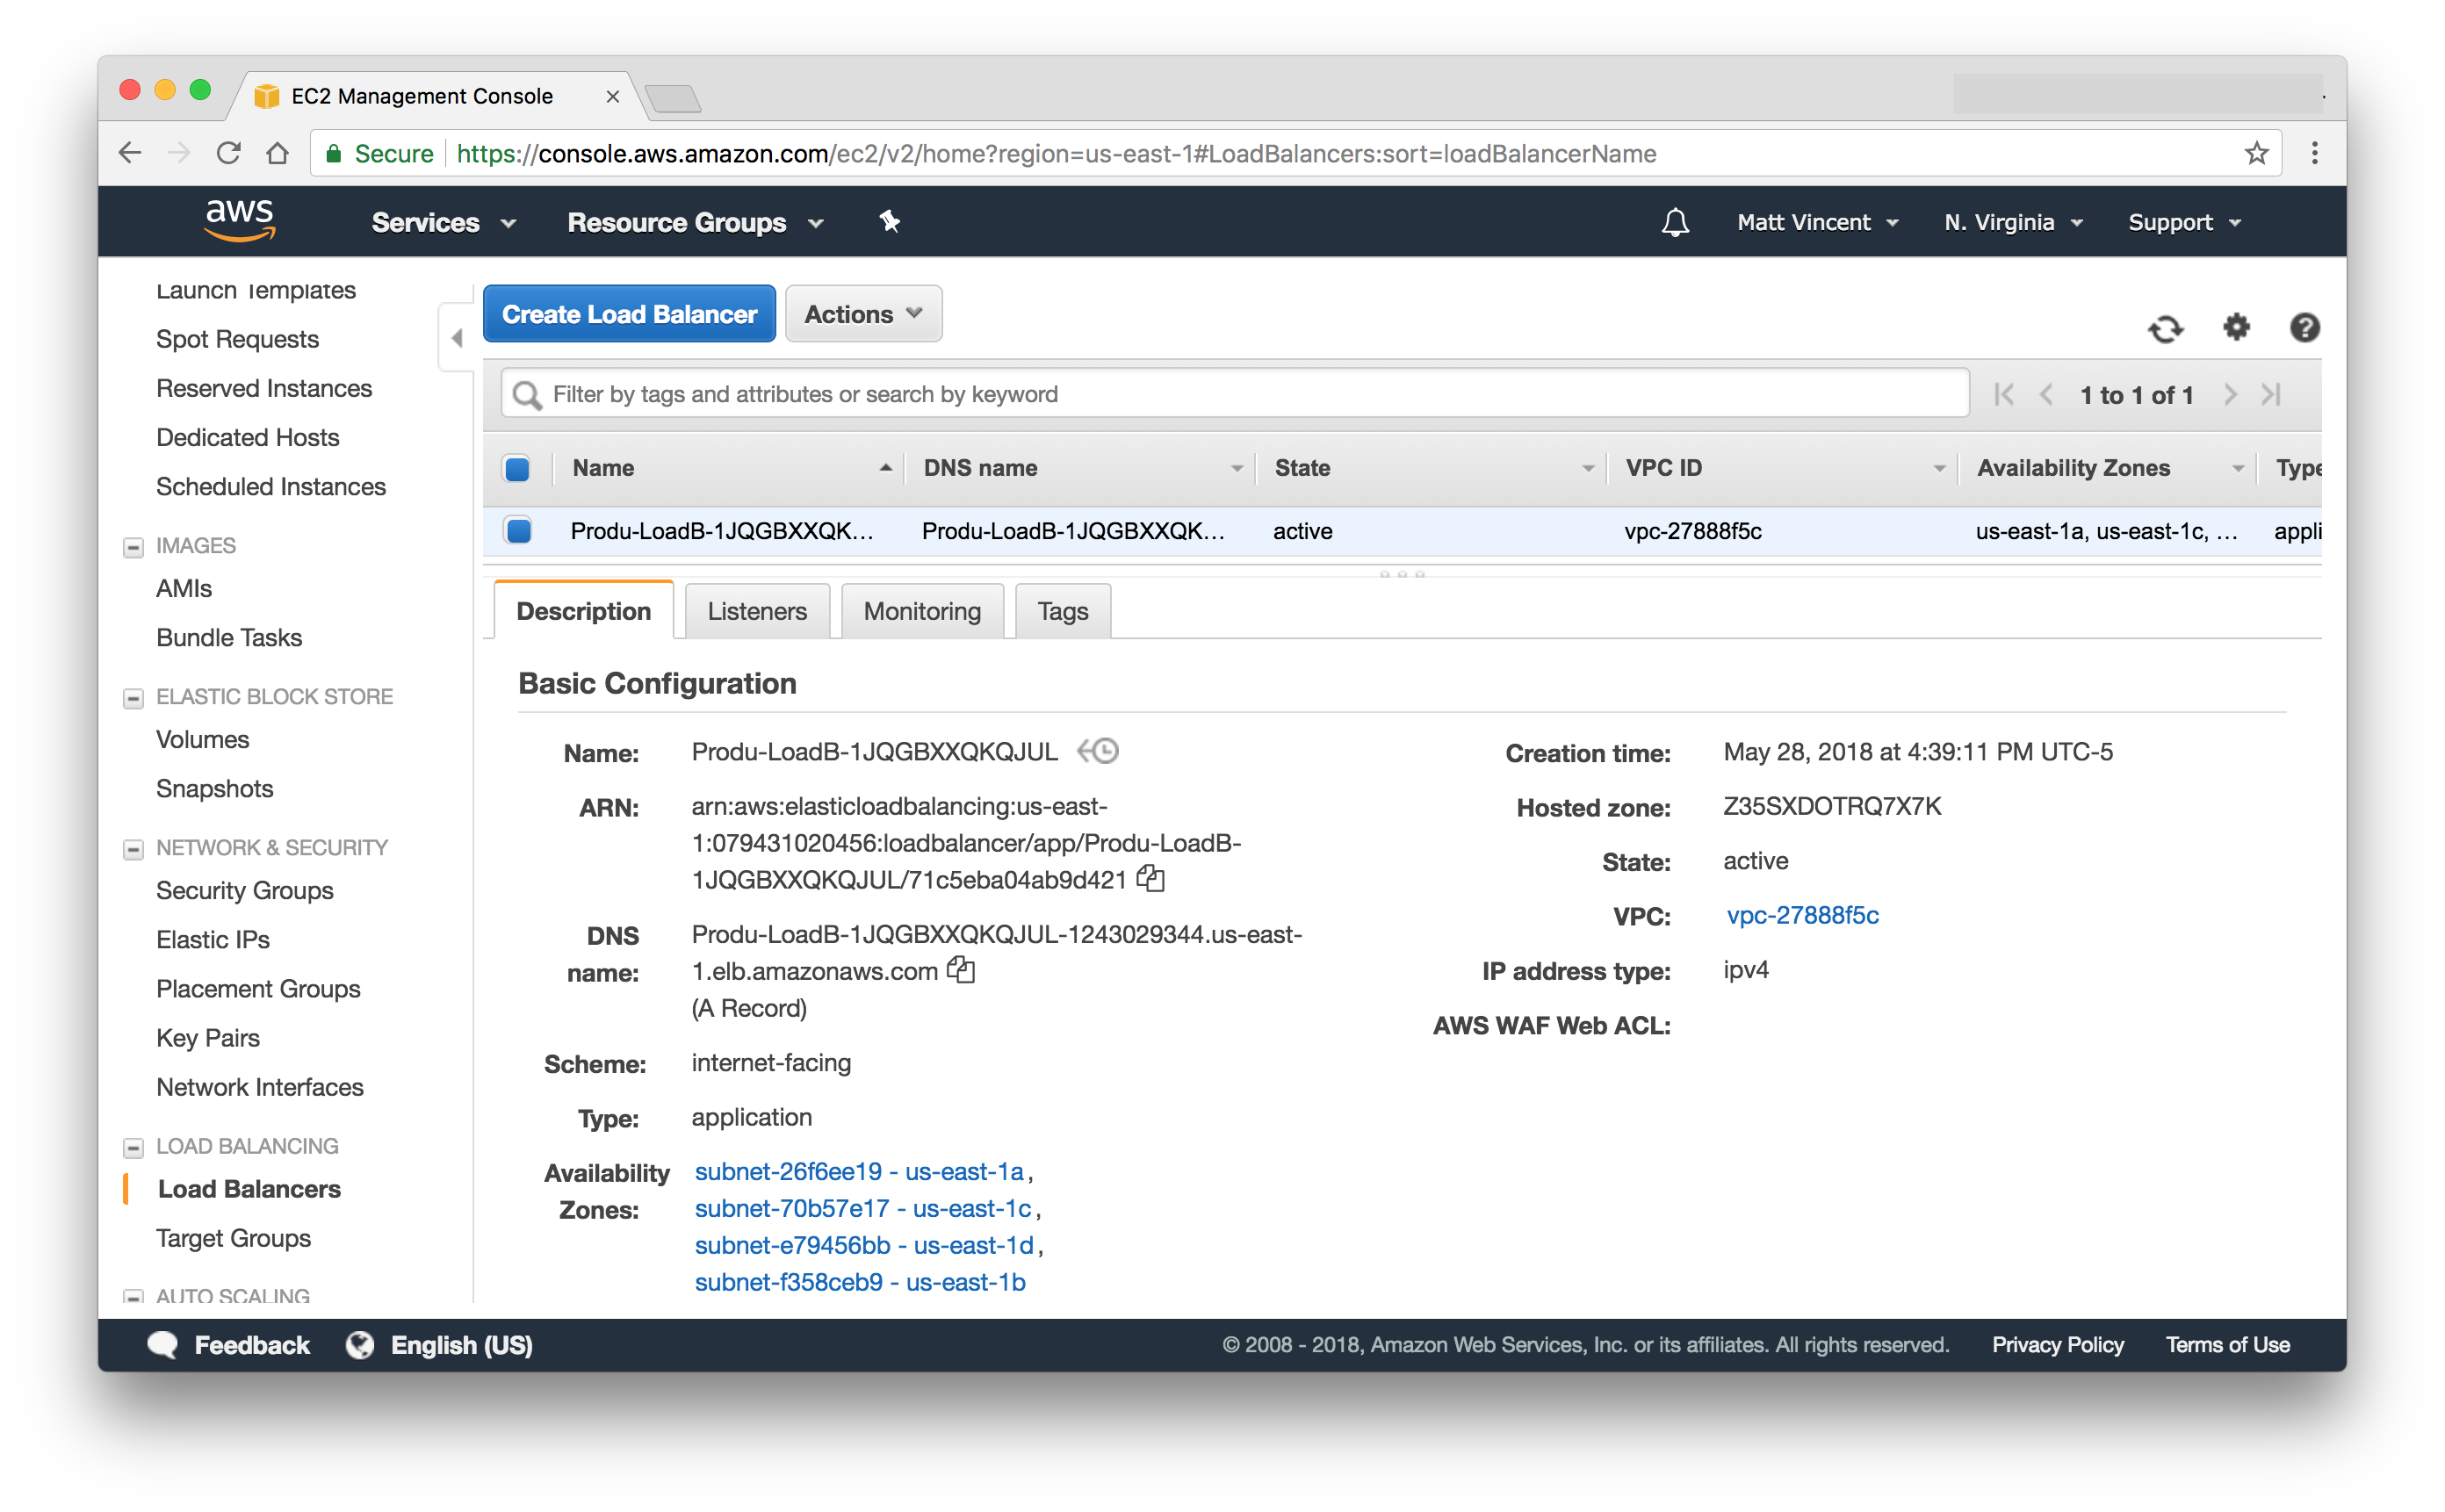
Or by adding an "Outputs" section to your cloudformation.template.yml:
Outputs:
  LoadBalancerDNS:
    Value: !GetAtt LoadBalancer.DNSName
Once you specify this output, you can grab the value by running this AWS CLI{:target="_blank"} command:
aws cloudformation describe-stacks --stack-name ProductService-DEV --query 'Stacks[0].Outputs[?(OutputKey==`LoadBalancerDNS`) ].OutputValue' --output text
You should be able to make an http:// request to the above domain name and get back our hello message.
dev_domain=$(aws cloudformation describe-stacks --stack-name ProductService-DEV --query 'Stacks[0].Outputs[?(OutputKey==`LoadBalancerDNS`) ].OutputValue' --output text)
curl http://$dev_domain/hello/

prod_domain=$(aws cloudformation describe-stacks --stack-name ProductService-PROD --query 'Stacks[0].Outputs[?(OutputKey==`LoadBalancerDNS`) ].OutputValue' --output text)
curl http://$prod_domain/hello/
See the changes we made here{:target="_blank}.
Table of Contents
- Introduction
- Unit Testing
- Koa
- Docker
- Cloudformation
- CodePipeline
- Fargate
- Application Load Balancer (this post)
- HTTPS/DNS
- Cognito
- Authentication
- DynamoDB
- Put Product
- Validation
- Smoke Testing
- Monitoring
- List Products
- Get Product
- Patch Product
- History Tracking
- Delete
- Change Events
- Conclusion
If you have questions or feedback on this series, contact the authors at nodereference@sourceallies.com.