Sharing Our Passion for Technology
& Continuous Learning
Automated Plant Watering System
Taking care of indoor plants can be work, especially if you have many of them. As you know water plays a major role in the health of plants, so lets automate it! Automation of watering plants can be cheap, fun and rewarding.
Some quick history about plant watering and why I wanted to build a system like this. I have several different type of plants that require different amounts of water and some that need water each day at different times for optimal growth development. This became very tedious and I wanted a way to automate it.
I started to look around at prices and functionality of products currently like this on the market. I found a few but they all mainly had a water bladder that you would refill twice a week and set the plant water on a timer. This was simply not going to do since I also did not want to refill a watering bladder and was not sure if I wanted to simply put my watering on a timer rather than a sensor. Thus, I started the automatic watering system in order to fulfill my needs and added a quick way for me to query how many times the water was being used.
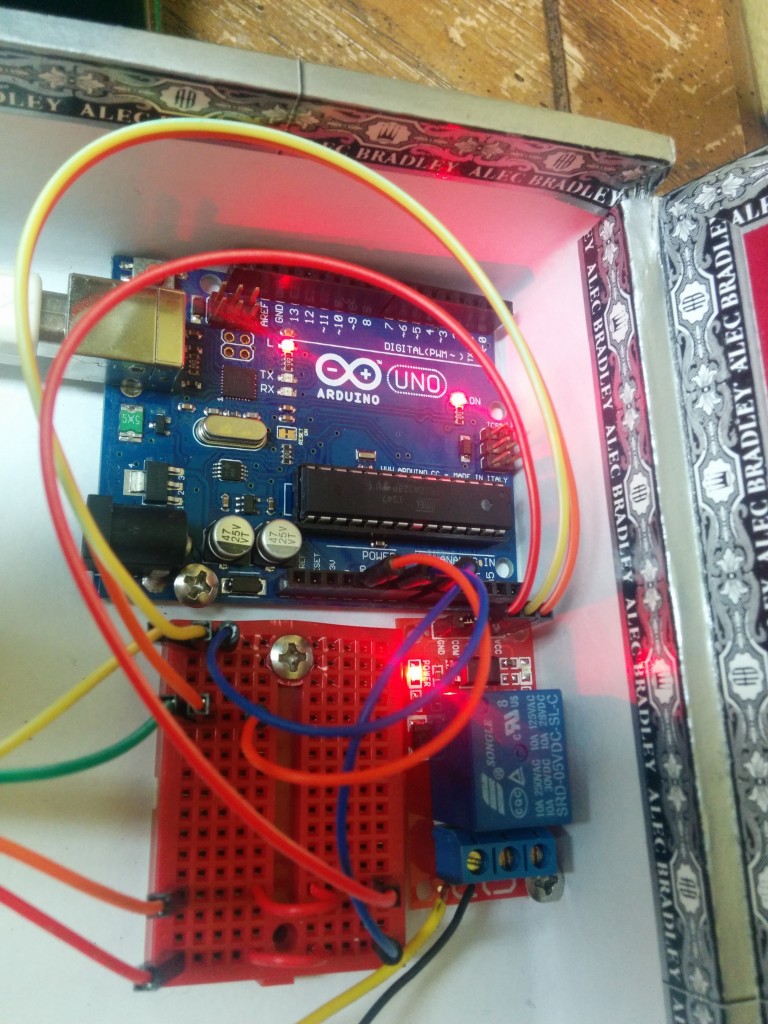
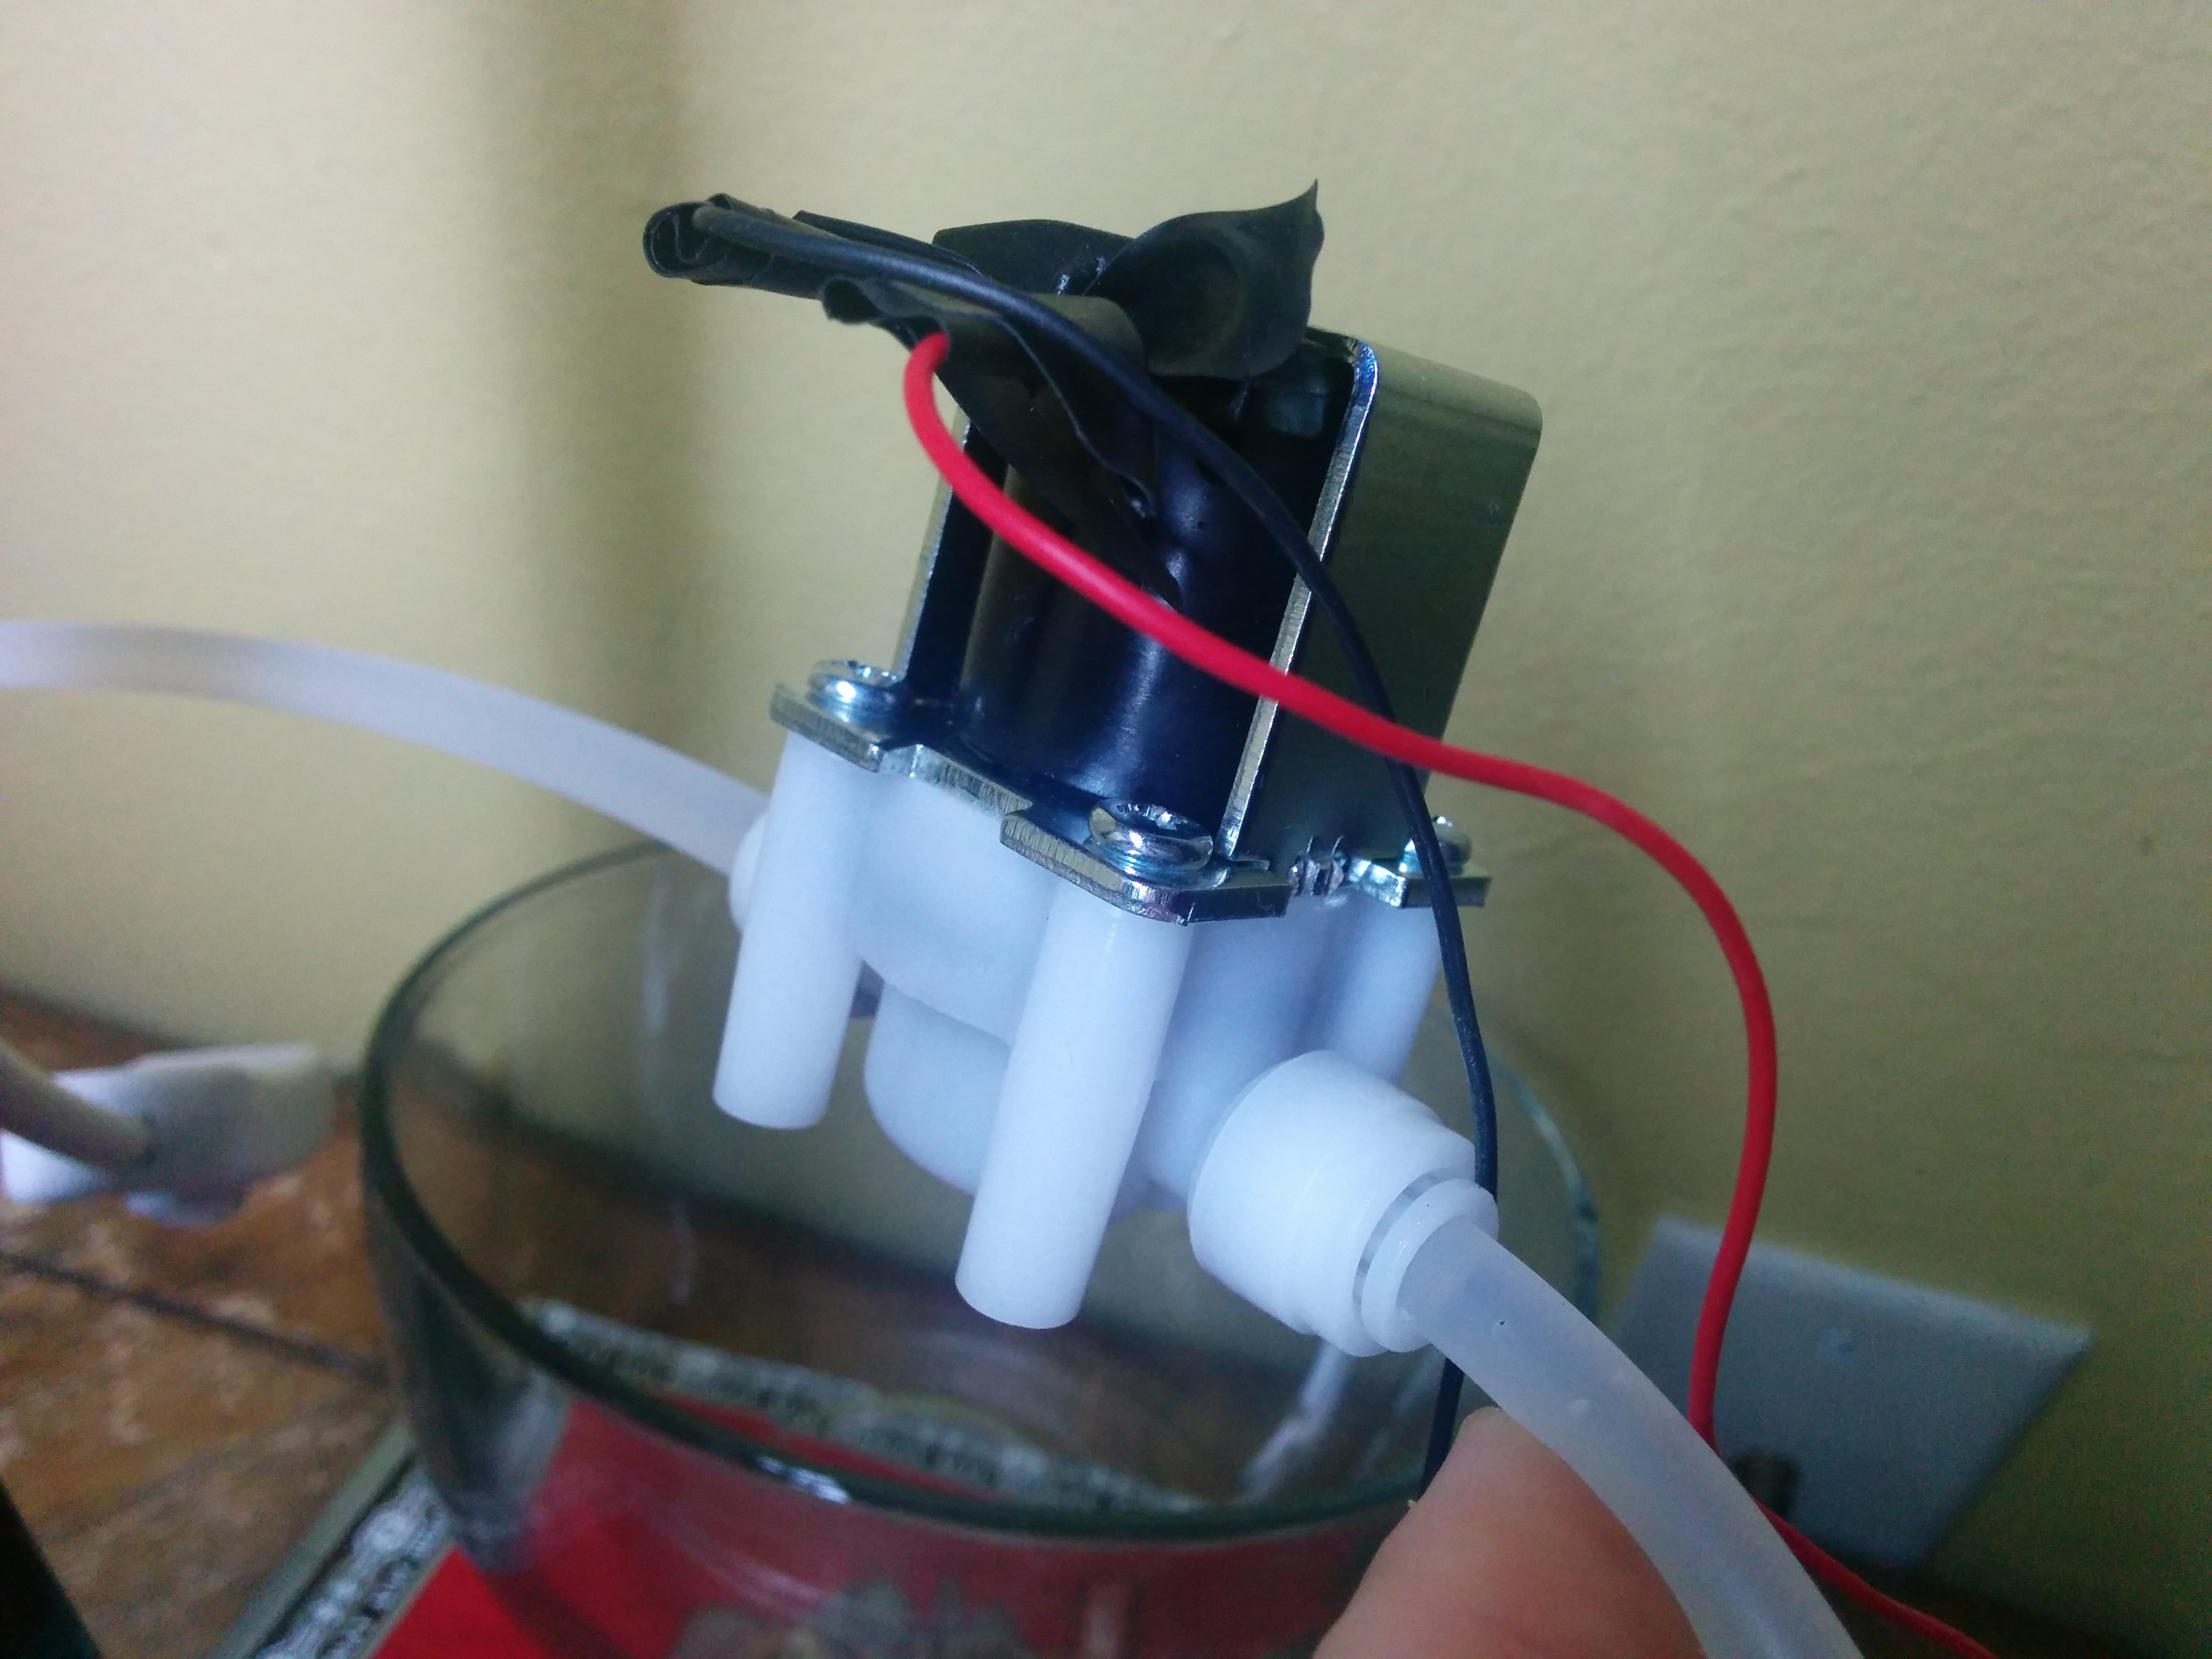
To make one for yourself you will simply need: Arduino, solenoid valve with a power supply, breadboard, electronic water sensor, rain bird sprinkler head, and a relay. The parts that I went with were on the cheaper side of things and totaled around $40.
If you are not familiar with the Arduino, it is a micro controller that will be doing all of the computing for us. It comes with a very easy to use IDE and it runs Sketch programing. This tutorial will not cover the basics of breadboarding or connecting modules to your Arduino. For further reference to that I suggest reading Adafruits websites since they have several nice basic tutorials. This guide simply covers the setup, code and functionally.
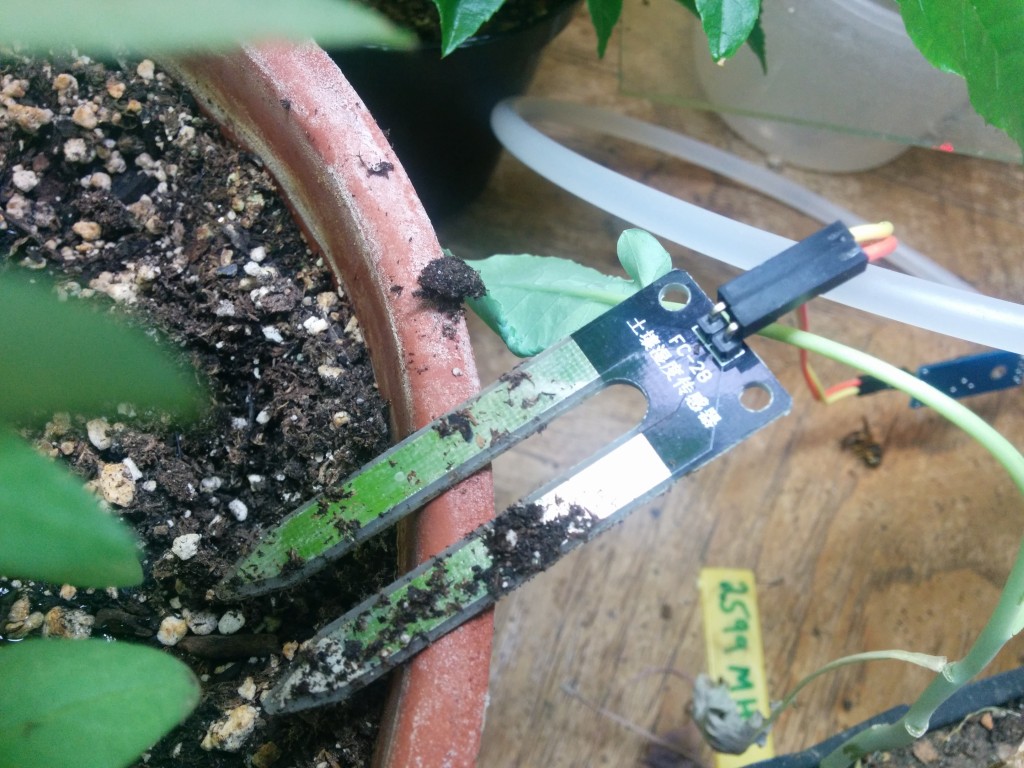
So lets begin! Start with connecting your electronic water sensor to one of the analog ports and power it using your Arduino. The water sensor (shown below) takes 5v and sends back analog signals to your Arduino so that you can determine what to do.
Now that you have a working sensor lets go ahead and write the code for the project. We will start off by reading the analog input and wait for a water reading of 500.
const int waterPin = A0; //Since we connected it to the first Analog Port
const int relayPin = 1;

void loop() {
   int sensorValue = analogRead(waterPin);
   if (sensorValue <= 500) {
   digitalWrite(relayPin,HIGH);
   } else
   digitalWrite(relayPin,LOW);
   }
   >delay(1000);
}
We now have the sensor reading the water level of the plants soil and checking if it is under 500 so that we can trigger the plant watering. To trigger the plant watering we are going to power on digital pin 1. When the plant is not wanting water we power digital pin 1 with LOW to turn it off. The delay is set to 1000 so that we have a pause before the next reading.
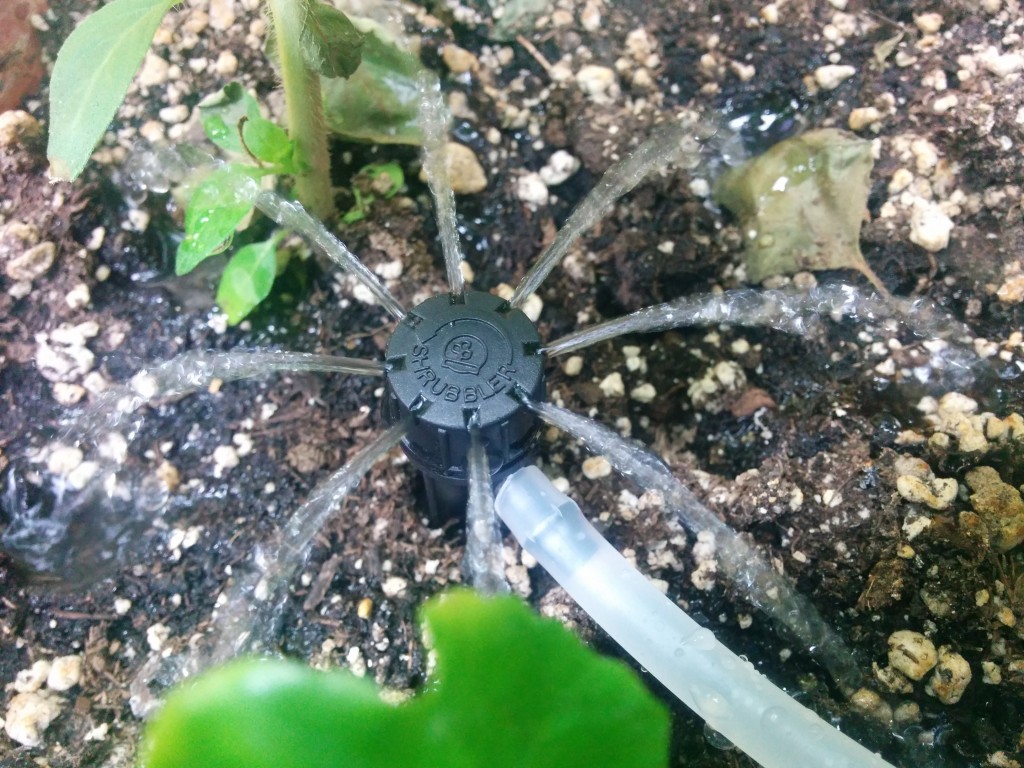
Lets go ahead and hook up our mechanical relay to receive it’s power control from digital pin 1. That way each time the plant requires water it will simply trigger the relay to open the solenoid value and produce the water for your plant. Below is an image detailing how I have everything setup.
The solenoid value is hooked up to my main water line so that it will never run dry. Once again the solenoid’s power supply is hooked up to the mechanical relay so that we can control it with the microcontroller. We need to hook it up to a relay since the Arduino will not power this 12v valve.
We now have a working automatic plant watering system. However were not recording any of the data on how frequently the soil is drying out. This next bit can be simply done with making another function in order to print to the serial port when and what the soil moisture is.
void printJson(int sensorValue) {

  Serial.print("{'water':'");
  Serial.print(sensorValue);
  Serial.print("'}");
  Serial.println(" ");
}
You can then place the call to printJson right after your trigger the relay. Reading the data from the serial port can be done a few different ways. The way that I do it is have the Arduino connected to a Raspberry PI that runs my mongodb so that the data can get stored and processed using the web server that the PI is also running. That way the data can be easily accessed within my abode.
This will conclude making an automatic plant watering system and I hope that it saves your plants as well as your time.