Sharing Our Passion for Technology
& Continuous Learning
< Back to Blog
Selenium IDE - Part II
In Part I we covered
- Setting Up
- Recording Tests
- Playing Back Tests
- Saving Test Cases
- Resuming Recording
- Saving Test Suites
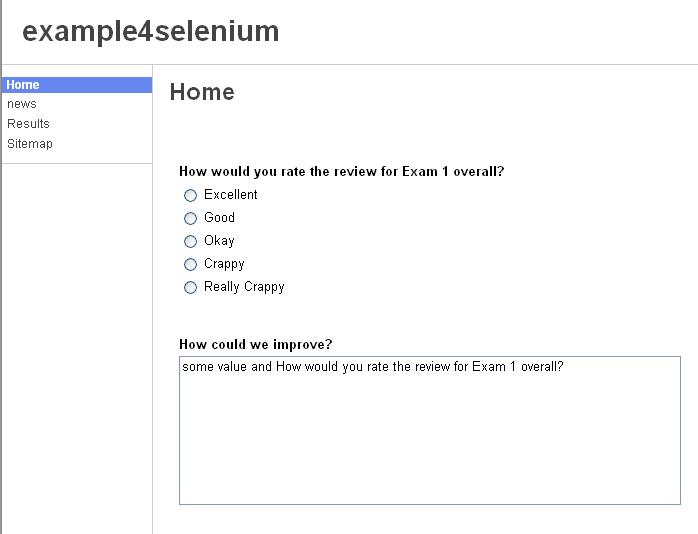
All examples will use the sample site https://sites.google.com/site/example4selenium/.
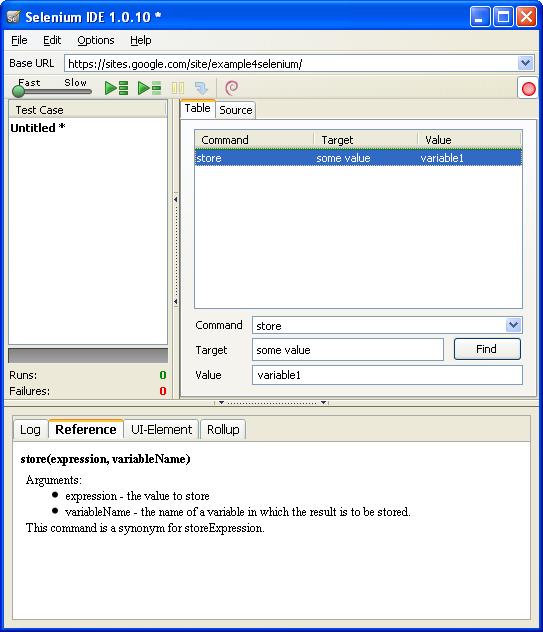
Store Value
- There are two ways to store values.
- First, you can define custom variables
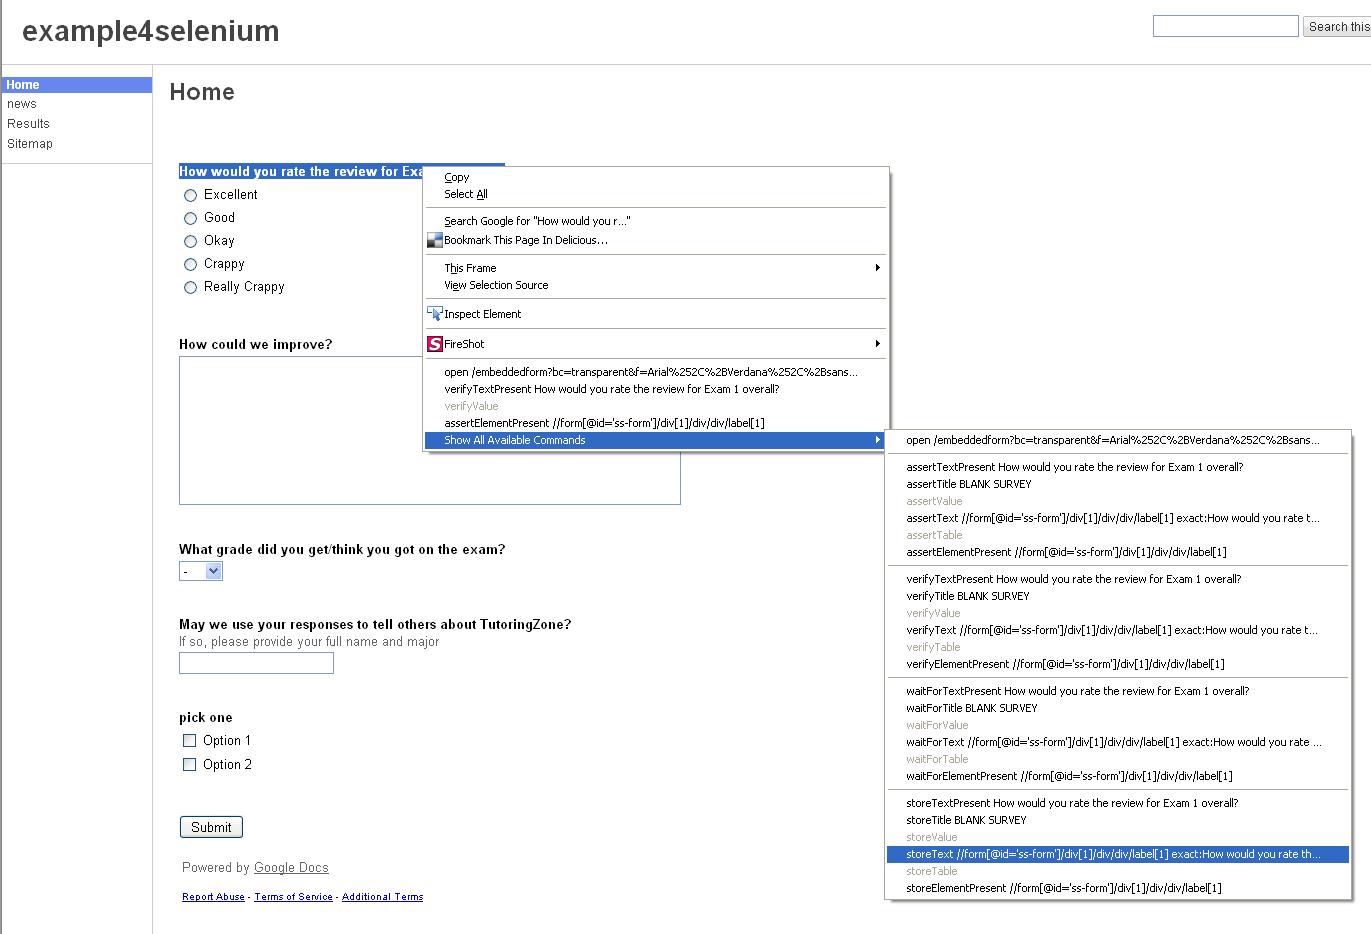
- Second you can use the drop-down 'storeText' option.
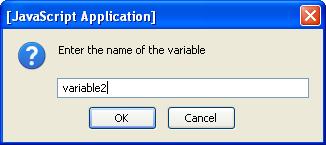
- Enter a variable name.
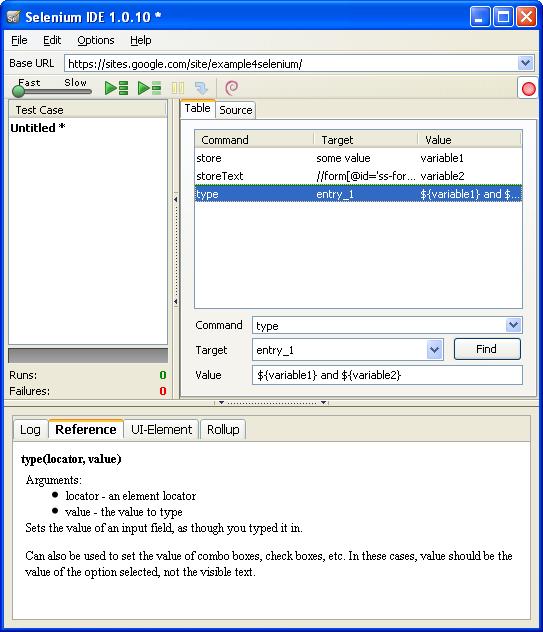
- Variables can be used by simply surrounding the variable name with '${ }'
- Running this script will result in an insert of both variables separated with an 'and'.
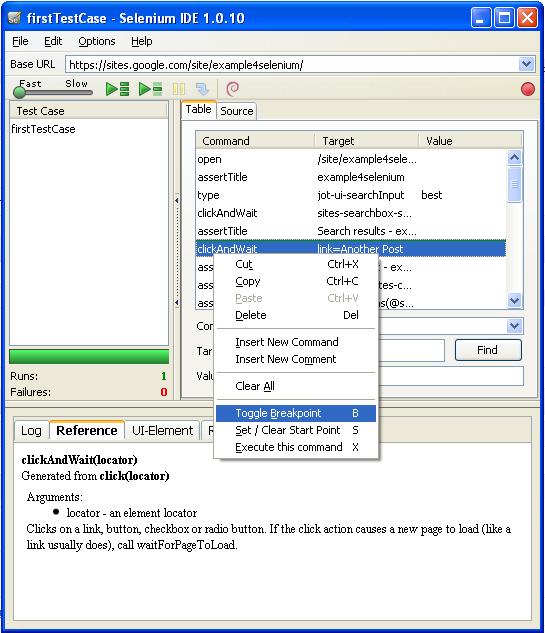
Debug
- To debug a script insert a breakpoint.
- Run the test case.
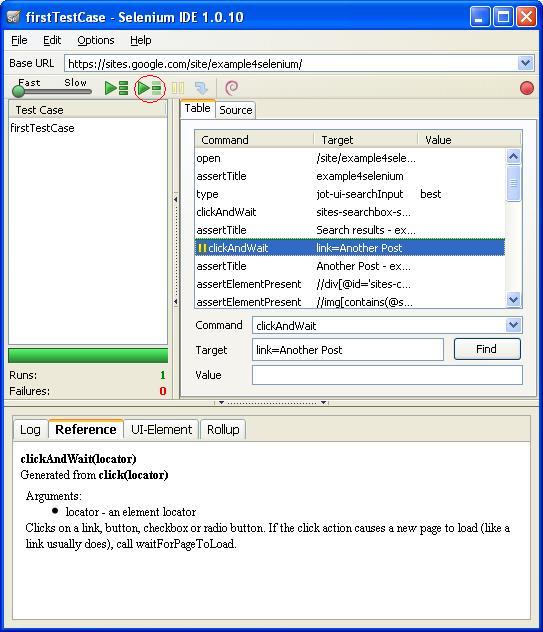
- The
 button resumes the execution of the script.
 - The
 button steps through the test case one action at a time.
XPath
- Selenium IDE can navigate html using XPath. If you are not familiar with XPath there is a beginners tutorial at https://www.w3schools.com/xml/xpath_intro.asp.
- Instead of referring to the id of a target you can locate an element with XPath.
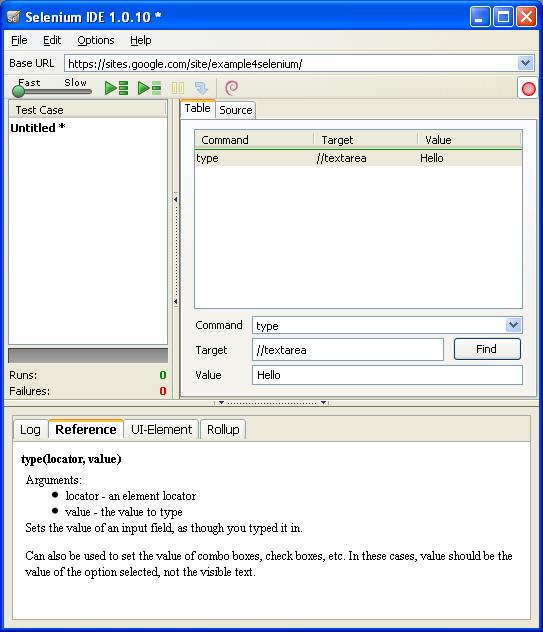
<li>You can verify your XPath by clicking the 'Find' button.  The element will be highlighted in the browser with flashing neon green if it exists.</li>
<li>If you want to select elements by position, you may want the following information. The traditional '//input[2]' does not work all the time in Selenium IDE. If you can not locate your target element by index, use the following syntax '//input/following::input'. This syntax specifies the location of an input that follows another input. This will result in the selection of the second input. Simply add another '/following::' to get to the next matching element. Unfortunately this syntax is quite verbose.</li>
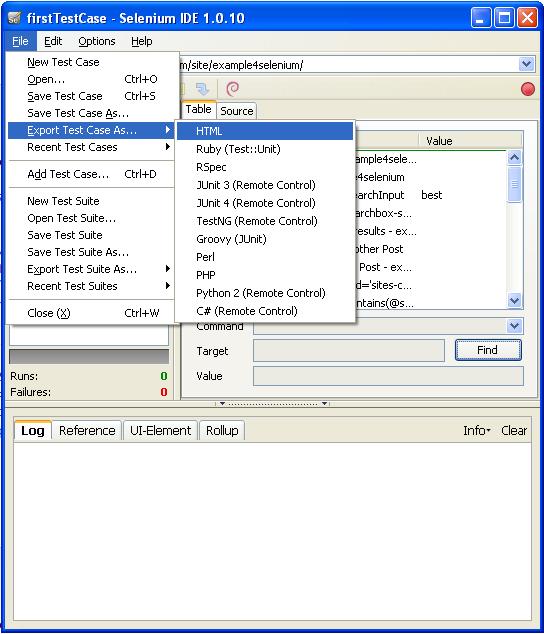
Exporting Scripts
- Recorded scripts can be extracted into a number of programming languages.
- For this example lets export this test case as 'JUnit 4 (Remote Control)'.
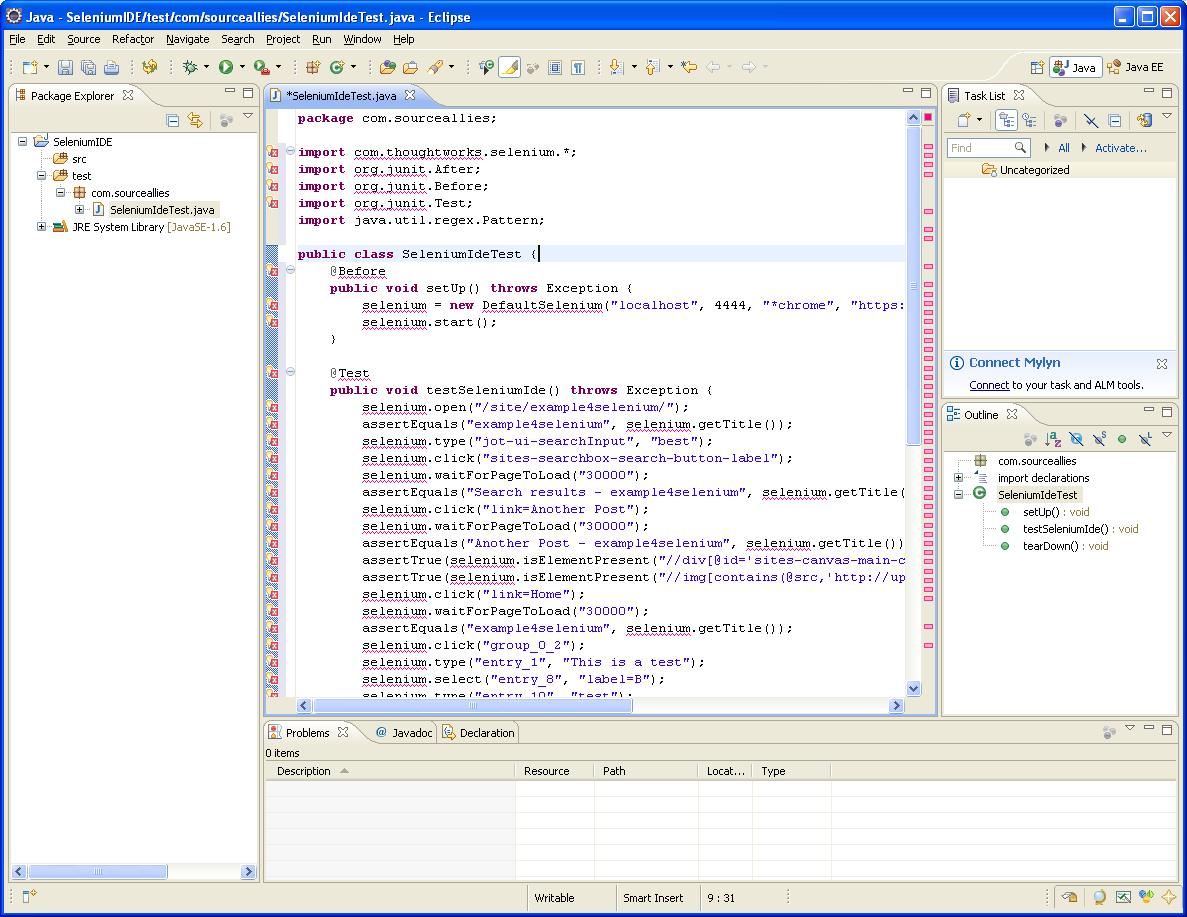
- Copy the resulting code into your favorite IDE.
- In order to get this to compile you will need to add the following dependencies to your classspath
- http://repo1.maven.org/maven2/junit/junit/4.8.2/junit-4.8.2.jar
- http://repo1.maven.org/maven2/org/seleniumhq/selenium/client-drivers/selenium-java-client-driver/1.0.1/selenium-java-client-driver-1.0.1.jar
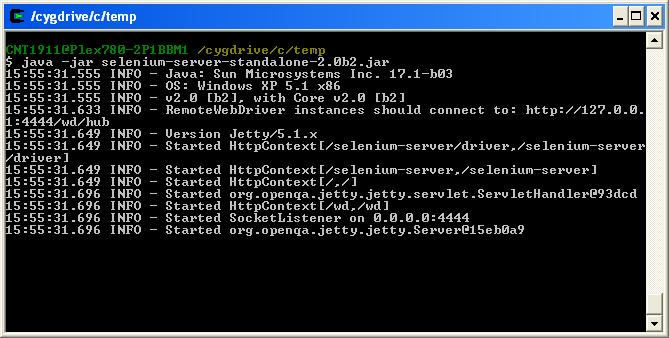
- Download http://selenium.googlecode.com/files/selenium-server-standalone-2.0b2.jar (archive)
- Open a new terminal window and navigate to the directory where you downloaded the jar.
- run 'java -jar selenium-server-standalone-2.0b2.jar'
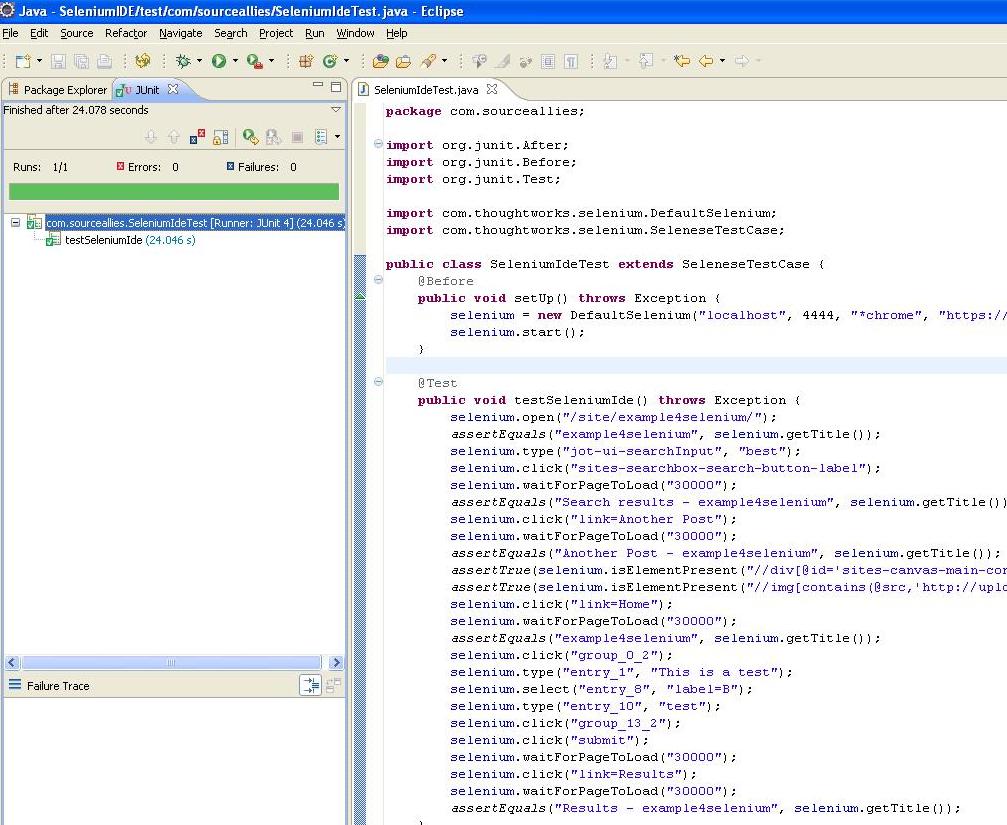
- Run the JUnit test.
- This test will open two new Firefox windows to execute the tests.
 selenium-server-standalone-2.0b2.jar (archive)
<img src="/img/posts/71.JPG" width="600" height="600" class="img-responsive">
-
At first glance Selenium IDE may seem like just a QA tool for recording acceptance tests. While this may be true, this is a powerful tool for communicating defects, preparing for demos, and generating acceptance tests in your language of choice. Selenium IDE is a rich testing tool-set worth exploring.